
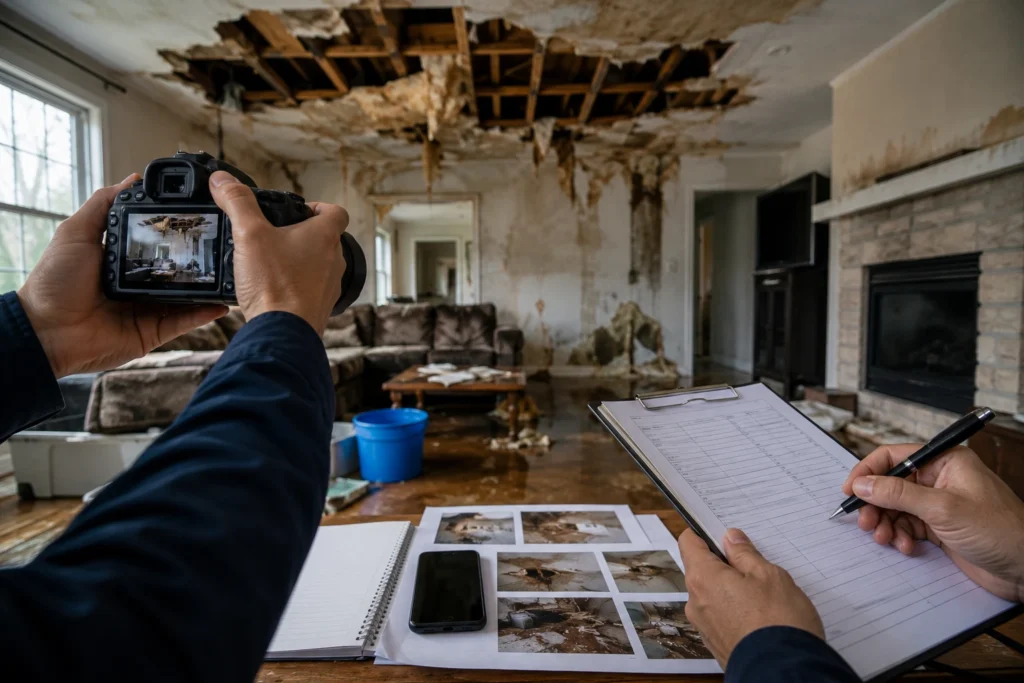
Property damage can turn an ordinary day upside down. One moment your home is secure, and the next you’re dealing with broken roofing, soaked flooring, or shattered windows after an unexpected event. During those stressful first hours, it’s easy to overlook one of the most important parts of the recovery process: how to document damage for your claim. The quality of your documentation often influences how efficiently an insurance company can evaluate your loss. Whether you’re filing after a fire, storm, burst pipe, or another covered event, gathering clear evidence from the beginning can make the entire claims process much smoother. Homeowners in Cedar Hill and surrounding communities can benefit from developing good documentation habits before conversations with the insurance company even begin.
Insurance companies evaluate claims based on evidence rather than assumptions. While adjusters conduct inspections, they generally weren’t present when the damage first occurred. That means photographs, videos, receipts, inventories, and maintenance records become valuable pieces of the overall picture. The stronger your documentation, the easier it becomes to demonstrate the cause, scope, and financial impact of the damage. Many homeowners unintentionally weaken their own claims by cleaning up too quickly, throwing away damaged belongings, or forgetting to photograph affected areas before temporary repairs begin. These mistakes are understandable, especially when families simply want to restore normal life as soon as possible. However, taking a little extra time to preserve evidence often pays off later during claim evaluations and settlement discussions.
Documentation isn’t about taking dozens of random pictures and hoping for the best. Instead, it involves creating a complete record that tells the story of what happened. Think of every photograph, receipt, inspection report, and repair estimate as another chapter supporting your claim. When these pieces fit together, they create a stronger and more organized presentation. Throughout this guide, we’ll walk through practical strategies you can begin using immediately after discovering property damage. From photographing every room to organizing repair invoices, each step builds a stronger claim file. Better organization also reduces stress because you’ll spend less time searching for documents when the insurance company requests additional information.
One of the biggest advantages of staying organized is confidence. Instead of wondering whether you’ve forgotten something important, you’ll know your records are complete and accessible. That confidence becomes especially valuable if questions arise later during inspections or negotiations. If your property was struck by severe weather, learning How to Identify Hail Damage by Roof Type can also help you recognize signs that deserve careful documentation before any repairs begin. Understanding what different roofing materials look like after a hailstorm makes it easier to capture meaningful evidence that accurately reflects the condition of your roof.
Why Damage Documentation Matters
When damage occurs, every decision made during the first several days can affect the outcome of an insurance claim. While homeowners naturally focus on cleanup and repairs, insurance companies focus on evidence. Documentation bridges those two priorities by preserving the condition of the property before significant changes occur. Without thorough documentation, important details may disappear forever. Water dries. Debris gets removed. Contractors replace damaged materials. Once those conditions change, proving exactly what happened becomes much more difficult.
Insurance Companies Rely on Evidence
Insurance professionals review claims using documentation gathered from multiple sources. Photographs, inspection reports, repair estimates, maintenance histories, and policy information all contribute to their evaluation. Simply saying that extensive damage exists usually isn’t enough. Instead, insurers often compare visual evidence with policy language, contractor reports, weather information, and adjuster inspections. Clear documentation helps connect those pieces together.
For example, wide-angle photographs establish the overall condition of a room, while close-up images highlight specific damage. Together, they provide context that individual photos alone cannot. Likewise, dated videos showing active leaks, standing water, or smoke damage often strengthen the overall presentation by capturing conditions that still images may not fully illustrate.
Documentation Can Influence Settlement Amounts
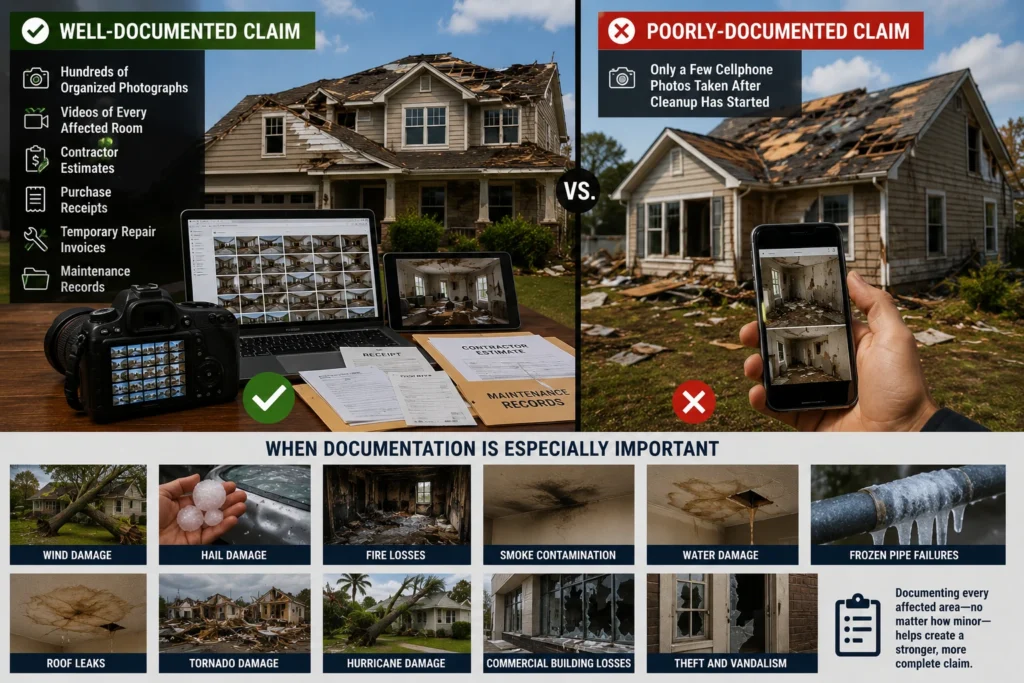
Insurance settlements generally reflect documented losses rather than estimated assumptions. Incomplete evidence can sometimes result in overlooked damage or disagreements about repair scope. Conversely, organized documentation makes it easier to demonstrate the full extent of covered losses. Consider two homeowners experiencing nearly identical storm damage.
The first homeowner provides:
- Hundreds of organized photographs
- Videos of every affected room
- Contractor estimates
- Purchase receipts
- Temporary repair invoices
- Maintenance records
The second homeowner provides only a few cellphone photos taken after cleanup has already started.
Although both properties suffered similar damage, the first claim often presents a much clearer picture of what occurred.
When Documentation Becomes Especially Important
Nearly every property claim benefits from strong documentation, but certain situations require even greater attention to detail.
These include:
- Wind damage
- Hail damage
- Fire losses
- Smoke contamination
- Water damage
- Frozen pipe failures
- Roof leaks
- Tornado damage
- Hurricane damage
- Commercial building losses
- Theft and vandalism
Each type of loss presents unique challenges. Water damage, for example, may spread behind walls where it isn’t immediately visible. Fire damage often includes both structural destruction and lingering smoke contamination. Wind events can affect roofing systems, gutters, siding, windows, fences, and landscaping all at once. Because every claim differs, documenting every affected area—even if it appears minor—helps create a more complete record.
Prioritize Safety Before Documenting Damage
No insurance claim is worth risking personal safety. Before grabbing your phone or camera, confirm that the property is safe to enter. Structural damage, electrical hazards, gas leaks, floodwater contamination, and unstable ceilings all create serious dangers that should never be ignored. If emergency responders instruct you to stay away, follow their guidance completely. Documentation can wait until professionals determine that conditions are safe.
Watch for Immediate Hazards
Common safety concerns include:
- Downed electrical lines
- Exposed wiring
- Gas odors
- Standing water near electrical systems
- Collapsed roofs
- Unstable walls
- Broken glass
- Flood contamination
If any of these hazards exist, contact the appropriate emergency services before entering the property.
Prevent Additional Damage
Insurance policies generally require homeowners to take reasonable steps to reduce additional damage after a covered event.
Temporary protective measures may include:
- Installing roof tarps
- Boarding broken windows
- Removing standing water
- Covering exposed belongings
- Drying wet materials
- Using temporary fencing around unsafe areas
However, remember to document these temporary repairs before and after they are completed. Photograph damaged roofing before installing tarps. Take pictures of broken windows before boarding them. Keep receipts for emergency mitigation work, temporary lodging, equipment rentals, and cleanup supplies. These records help demonstrate that you acted responsibly while protecting the property from further deterioration.
Start Photographing the Damage Immediately
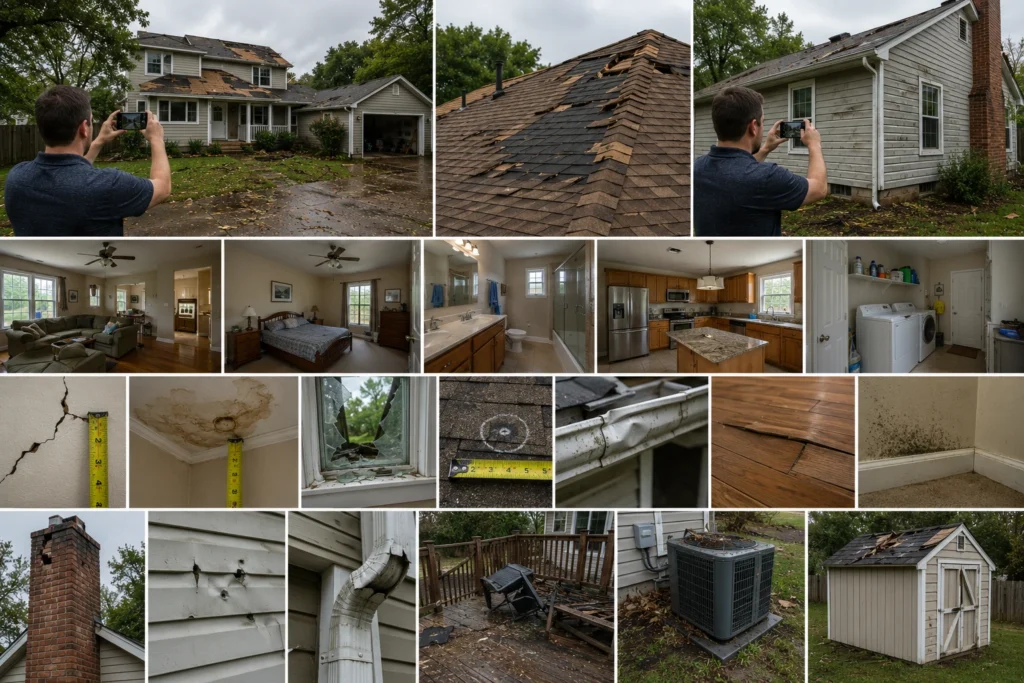
Once conditions are safe, begin photographing everything. Don’t worry about taking too many pictures. Digital storage is inexpensive, while missed documentation opportunities cannot be recreated later. Think like an investigator. Capture the overall scene before focusing on individual damage.
Begin with Wide-Angle Photos
Start outside whenever possible.
Take photographs showing:
- Entire sides of the home
- Roof slopes
- Driveways
- Fencing
- Trees
- Detached buildings
- Vehicles
- Landscaping
Then move indoors. Photograph every room from multiple corners. Even rooms that appear unaffected should be documented because they establish the property’s overall condition.
Capture Detailed Close-Ups
After completing wide-angle photographs, focus on specific damage.
Examples include:
- Cracked drywall
- Ceiling stains
- Broken windows
- Missing shingles
- Dented gutters
- Warped flooring
- Burn marks
- Mold growth
- Damaged appliances
If possible, place a ruler or measuring tape beside damaged areas to provide scale. This helps demonstrate the size of impact marks, cracks, holes, or other defects.
Photograph Every Room
Don’t assume only heavily damaged areas matter.
Walk through:
- Bedrooms
- Bathrooms
- Kitchens
- Hallways
- Closets
- Laundry rooms
- Garages
- Attics
- Basements
- Utility rooms
Even minor conditions may later become important during the adjustment process.
Document Exterior Damage Thoroughly
Exterior inspections should include:
- Roofing
- Chimneys
- Gutters
- Downspouts
- Siding
- Windows
- Doors
- Decks
- Patios
- Air conditioning units
- Outdoor furniture
- Storage buildings
Storms often affect multiple components simultaneously.
Capturing every impacted area creates a more complete claim file.
Take Photos from Multiple Angles
One picture rarely tells the whole story.
Photograph damage:
- Up close
- From several feet away
- From opposite directions
- In landscape orientation
- In portrait orientation when appropriate
Different angles often reveal details hidden in a single image.
Record Dates Automatically
Modern smartphones automatically save timestamps within photo metadata. Avoid editing original files whenever possible. Instead, store originals separately and make copies only if adjustments are needed for printing or sharing. Backing up images to secure cloud storage also reduces the risk of losing valuable documentation if a phone becomes damaged or misplaced.
Record Video Walkthroughs
Photographs freeze a moment in time, but videos tell a more complete story. A slow walkthrough of your property captures how different areas connect, the extent of the damage, and conditions that may not be obvious in still images. When learning how to document damage for your claim, adding video evidence provides another layer of credibility to your documentation.
As you record, narrate what you’re seeing. Mention the room you’re in, describe visible damage, and point out any noticeable odors, standing water, broken fixtures, or structural concerns. Speak clearly without rushing. If water is actively leaking or smoke damage remains visible, include those conditions as well because they demonstrate the property’s state immediately after the loss.
Walk slowly through every affected room while keeping the camera steady. Avoid quick movements that make footage difficult to review. Outside, document damaged roofing, siding, fencing, landscaping, gutters, and detached structures from multiple perspectives. Together, photographs and videos create a comprehensive visual record that supports your claim.
Create a Detailed Inventory of Damaged Property
One of the most overlooked parts of a property claim is the personal property inventory. While structural damage often receives immediate attention, replacing household belongings can represent a significant portion of the overall loss. Instead of relying on memory weeks later, begin listing damaged items room by room.
A simple inventory should include:
| Item | Brand/Model | Approximate Age | Purchase Price | Estimated Replacement Cost | Damage Description |
| Television | Samsung | 3 years | $900 | $950 | Water damaged |
| Sofa | Ashley Furniture | 5 years | $1,200 | $1,400 | Smoke damage |
| Laptop | Dell | 2 years | $1,100 | $1,150 | Water intrusion |
| Dining Table | Custom | 6 years | $1,800 | $2,000 | Fire damage |
Include every room, including areas that are easy to forget.
Don’t overlook:
- Attics
- Garages
- Storage sheds
- Closets
- Crawl spaces
- Home offices
- Laundry rooms
- Outdoor kitchens
Small household items may seem insignificant individually, but together they can represent thousands of dollars in losses.
Gather Supporting Documents
Documentation extends far beyond photographs. Financial records help establish ownership, value, and maintenance history, making them valuable when supporting your insurance claim.
If available, collect:
- Purchase receipts
- Credit card statements
- Bank transaction records
- Warranty documents
- Product registrations
- Installation invoices
- Maintenance records
- Home inspection reports
- Appraisals
- Service contracts
Many homeowners no longer keep paper receipts, and that’s perfectly understandable. Fortunately, alternative records often help verify purchases. Digital invoices, email confirmations, online order histories, and bank statements can all provide useful evidence. For higher-value items such as jewelry, artwork, collectibles, or specialty equipment, previous appraisals or professional valuations can be especially helpful.
Document Structural Damage Thoroughly
Structural damage deserves careful attention because not every issue is immediately visible. What appears to be a small ceiling stain could indicate extensive moisture hidden above insulation, while a single crack in drywall may signal movement elsewhere in the structure. Inspect each major building component carefully.
Roof
Document:
- Missing shingles
- Lifted shingles
- Impact marks
- Flashing damage
- Ridge cap damage
- Soft spots
- Interior ceiling leaks
Whenever possible, avoid climbing onto a damaged roof yourself. Instead, photograph visible conditions safely from the ground or have a qualified professional perform the inspection.
Walls and Ceilings
Look for:
- Cracks
- Water stains
- Smoke residue
- Peeling paint
- Warped drywall
- Bubbling finishes
Take both wide-angle and close-up photographs to show the location and severity of each issue.
Floors
Flooring often reveals hidden moisture.
Inspect:
- Hardwood
- Tile
- Laminate
- Carpet
- Vinyl flooring
- Concrete slabs
Watch for buckling, swelling, discoloration, soft areas, or loose flooring materials.
Foundation
Although foundation damage isn’t always immediately obvious, document any:
- New cracks
- Shifting
- Uneven floors
- Door alignment problems
- Window binding
- Separation around walls
If these conditions appeared after the loss event, photograph them from several angles and continue monitoring for changes.
Windows and Doors
Broken windows and damaged doors may affect security as well as weather protection.
Photograph:
- Broken glass
- Bent frames
- Water intrusion
- Damaged locks
- Seal failures
- Warping
Include both interior and exterior views whenever practical.
Keep Records of Every Conversation
Documentation doesn’t stop with physical damage. Communication records become equally important throughout the claim process. Create a simple claim journal that includes every interaction with the insurance company, contractors, inspectors, mitigation companies, and other professionals.
Record:
- Date
- Time
- Person’s name
- Company
- Phone number or email
- Claim number
- Topics discussed
- Promises made
- Follow-up actions
These notes can quickly resolve misunderstandings if questions arise later. For example, if an adjuster requests additional documentation during a phone call, your written record provides a timeline showing exactly when that request occurred. Maintaining organized communication records also demonstrates professionalism and helps keep the claim moving efficiently. For additional background on how buildings respond to external forces during storms and other catastrophic events, the concept of Structural engineering is explained in detail on Wikipedia, offering helpful context about how structures are designed to resist damage.
Save Every Repair Estimate
Professional repair estimates help establish the scope and cost of restoring your property. Even if your insurance company plans to conduct its own inspection, independent estimates provide valuable points of comparison and help ensure no damaged areas are overlooked. Request detailed written estimates from reputable contractors whenever possible. Rather than accepting a single lump-sum figure, ask for itemized pricing that breaks down labor, materials, equipment, and any specialized services.
Helpful estimates may come from:
- Roofing contractors
- Water mitigation companies
- Fire restoration specialists
- General contractors
- Electricians
- Plumbers
- Flooring installers
- HVAC professionals
Keep digital and printed copies of every estimate. If updated estimates are prepared as additional damage is discovered, save those versions as well.
Track Additional Living Expenses (ALE)
When a covered loss makes your home temporarily uninhabitable, your insurance policy may include coverage for Additional Living Expenses (ALE). These costs can accumulate quickly, so careful recordkeeping is essential.
Common ALE expenses include:
- Hotel accommodations
- Temporary rental housing
- Restaurant meals
- Laundry services
- Pet boarding
- Extra fuel or transportation costs
- Storage unit rentals
- Moving expenses
Create a dedicated folder for every receipt. Organizing expenses by date makes reimbursement requests much easier and demonstrates exactly how the loss affected your daily life. A simple spreadsheet with the date, vendor, purpose, and amount can save hours of work later.
Don’t Throw Away Damaged Property Too Soon
After a disaster, the urge to clean up is understandable. However, disposing of damaged belongings too early may remove valuable evidence before your insurance company has an opportunity to inspect it.
Whenever practical, retain damaged items until your adjuster confirms they are no longer needed for documentation.
Examples include:
- Damaged shingles
- Broken appliances
- Burned furniture
- Water-damaged electronics
- Plumbing components
- Flooring materials
If health hazards require immediate disposal, take extensive photographs and videos beforehand. Keep disposal receipts whenever possible.
Common Documentation Mistakes That Can Hurt Your Claim
Even well-intentioned homeowners sometimes make mistakes that complicate the claims process. Fortunately, most are avoidable.
Some of the most common include:
- Waiting days before taking photographs
- Cleaning damaged areas before documenting them
- Forgetting hidden spaces such as attics or crawl spaces
- Throwing away damaged property too early
- Losing repair invoices or receipts
- Failing to document temporary repairs
- Keeping incomplete communication records
- Relying only on memory instead of written inventories
Learning how to document damage for your claim means recognizing these pitfalls before they affect your case. Small oversights can become larger issues if key evidence is unavailable later.
Digital Tools That Make Documentation Easier
Technology makes organizing claim information far easier than it was just a few years ago.
Consider using:
| Tool | Purpose |
| Cloud storage | Back up photos and videos |
| Mobile scanning apps | Digitize receipts and documents |
| Spreadsheet software | Track inventories and expenses |
| Note-taking apps | Record conversations and claim updates |
| External hard drives | Maintain offline backups |
Organize folders using a consistent structure, such as:
- Photos
- Videos
- Receipts
- Estimates
- Insurance correspondence
- Temporary repairs
- Additional living expenses
- Inspection reports
Keeping everything organized from day one reduces stress and helps you respond quickly if additional information is requested. For readers interested in the engineering principles behind building performance, the article on Structural engineering at Wikipedia provides useful background on how structures are designed to withstand various forces.
When a Public Adjuster Can Help Organize Your Documentation
Some claims are relatively straightforward, while others involve extensive structural damage, multiple contractors, or disagreements about the scope of repairs. In these situations, professional assistance can help organize documentation and present a more complete claim.
A public adjuster may assist by:
- Reviewing photographs and videos
- Identifying damage that may have been overlooked
- Organizing inventories
- Evaluating repair estimates
- Reviewing policy provisions
- Preparing detailed claim documentation
- Communicating with the insurance company throughout the process
Property owners in Cedar Hill often discover that the claims process involves far more paperwork than expected. Having organized documentation from the beginning can reduce delays and provide a clearer picture of the full extent of the loss.
Best Practices for Keeping Your Claim Organized
Strong documentation isn’t created in one afternoon. It’s built by consistently collecting, organizing, and preserving information throughout the life of the claim.
Follow these best practices:
- Photograph everything before cleanup begins.
- Record video walkthroughs of every affected area.
- Save every receipt related to the loss.
- Maintain an updated property inventory.
- Keep copies of all repair estimates.
- Back up digital files in more than one location.
- Document every phone call and email.
- Continue photographing repairs as work progresses.
- Store documents in clearly labeled folders.
- Review your records periodically to ensure nothing is missing.
These habits not only strengthen your documentation but also make future conversations with contractors, adjusters, and insurance representatives much more productive. Throughout the process, remember that how to document damage for your claim is not a one-time task. Documentation should continue until repairs are complete and the claim has been fully resolved.
Conclusion
Recovering from property damage is rarely simple, but careful preparation can make the insurance process considerably more manageable. The sooner you begin documenting the loss, the more complete your evidence will be. Clear photographs, detailed videos, organized inventories, repair estimates, receipts, and communication logs all work together to support your position and reduce uncertainty during the claim review.
No single document tells the entire story. Instead, every record you preserve adds another layer of support that helps demonstrate the cause, extent, and financial impact of the damage. Whether you’re dealing with wind, hail, fire, water, or another covered event, investing time in how to document damage for your claim can help you stay organized and prepared from start to finish.
If questions arise or the claim becomes more complex than expected, professional guidance may provide additional clarity. Homeowners and business owners in Cedar Hill who maintain thorough documentation and seek knowledgeable assistance when needed are often in a stronger position to navigate the claims process with confidence. Ultimately, understanding how to document damage for your claim is one of the most valuable steps you can take to protect your interests after a property loss.
FAQs
Ensure the property is safe to enter. Once it’s safe, begin taking photos and videos before cleaning up or making temporary repairs.
There is no set limit. Take as many clear photos as needed to capture every affected area from multiple angles and distances.
Yes. Videos provide context that photos may miss, such as the layout of the property, ongoing leaks, or the overall extent of the damage.
Save repair estimates, receipts, invoices, maintenance records, warranties, inspection reports, and all communication with your insurance company.
It’s best to wait until your insurance company or adjuster has inspected them unless the items pose a health or safety hazard.
Alternative proof such as bank statements, credit card records, online purchase histories, or warranty registrations may help verify ownership and value.
Yes. Take photos before and after temporary repairs and keep all receipts for materials or emergency services.
Retain all records until your claim is fully settled and repairs are complete. It’s also wise to keep copies for future reference.
Yes. A public adjuster can review your evidence, organize claim documents, identify overlooked damage, and help present a well-supported claim.
Proper documentation helps establish the cause, extent, and value of your losses, making it easier to support your insurance claim and reduce potential disputes.